We love our Friday nights. We look forward to them all week long. There's no better way to unwind after a long week than with wine, a bad movie, and a delicious pizza. And for our pizza to be truly delicious, it has to start at home. We used to be more open to ordering pizza back when we lived in the U.S., because sometimes after a particularly long week, even pizza is to tiring to think about. But here, well, Ben works fewer hours, I don't work, and delivery pizza just isn't the same. The Dutch just don't have Papa John's. Or good local places (in our area, anyway). It's just not the same.
So of course we make our own! Would you expect anything less?
We start with a whole wheat pizza crust, which we have adapted from a recipe on epicurious, and which Ben has perfected. I may often be the kitchen genius around here, but Ben, he is the pizza dough master. It's light and puffy and slightly chewy, but it's not too much. It's just substantial enough to hold up whatever toppings we pile on.
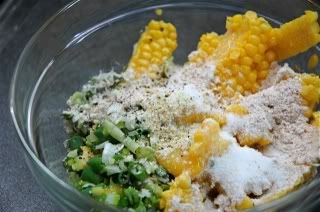
Sometimes we follow a recipe if we're feeling adventurous and want a new flavor, but often we just go with some of our standard toppings including, but not limited to: canned diced tomatoes with basil, garlic and oregano; fresh tomatoes slow roasted with garlic when they're in season; spinach; caramelized shallots or grilled cipollini onions; shredded mozzarella, provolone, feta, parmesan; fresh basil. We also have guest appearances by ingredients such as portabello mushrooms, chicken, sun dried tomatoes, roasted garlic, steak, peppers, artichoke hearts... Whatever sounds good. That's the joy of making our own pizza.
The other joy is sitting on the floor in pajamas and watching the pizza cook.

Mmmm...
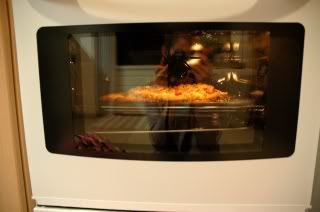
And voilà! Pizza!
Since we don't follow a recipe most of the time, I can't give you directions for our particular brand of pizza. You'll have to find your own signature flavors. But we can give you a good starting place, our pizza dough recipe (from epicurious, as adapted by Ben)
Pizza Dough
Ingredients
1 (1/4-ounce) package active dry yeast (2 1/4 teaspoons)
1/2 cup whole wheat flour
1 1/2 to 2 cups bread flour plus additional for kneading and dredging
1 cup warm water (105 - 115°F)
1 teaspoon salt
2 teaspoons italian seasoning (or grated parmesan, or whatever sounds good to you)
Preparation
Make dough:
Whisk together yeast, 1 tablespoon flour, and 1/4 cup warm water in a measuring cup and let stand until mixture develops a creamy foam, about 10 minutes. (If mixture doesn't foam, discard and start over with new yeast.)
Stir together salt and 1 cup bread flour and 1/2 cup whole wheat flour and seasoning in a large bowl. Add yeast mixture and remaining 3/4 cup warm water and stir until smooth, then stir in another 1/2 cup bread flour. If dough sticks to your fingers, stir in just enough flour (up to 3/4 cup), a little at a time, to make dough just come away from side of bowl. (This dough may be wetter than other pizza doughs you have made.)
Knead dough on a lightly floured surface with floured hands, lightly reflouring work surface and your hands when dough becomes too sticky, until dough is smooth, soft, and elastic, about 10 minutes.
Or, if you have a mixer with a dough hook, mix on low until the dough comes together and then on high until it's nice and smooth. Then knead it by hand for a minute or so and form into a ball.
Place the dough in an oiled bowl, cover, and let rise in a warm place until doubled in bulk, about an hour. Divide into two balls. If you only want to use one, the extra dough keeps well in the freezer. We just put in a ziploc freezer bag and then bring it out several hours before we need it and set it on the counter to let it come to room temperature.
To bake the pizza, preheat the oven and pizza stone (or cookie sheet) at the highest temperature possible for an hour or so. A very hot oven and pizza stone makes the crust nice and crispy on the bottom. Roll dough into a circle with a rolling pin or work it into a circle with your hands and place it on the pizza stone. Top the pizza with whatever you want and bake for about 12-15 minutes, or until cheese is turning golden brown at the edges.

Turn on your Lifetime movie, open your wine, enjoy!